(805)242-1586 justin@fluentguitar.com

Guitar Mastery: Intro and Tips 1 & 2

 
     What is mastery? What is talent? Do you need to have talent to reach mastery? Are you born with talent or can it be cultivated? These are all questions answered by Dan Coyle’s book, The Talent Code, and the follow up, The Little Book of Talent. Coyle shows through various examples from across multiple fields that the key to developing talent is through deep, targeted practice. One does not achieve mastery but becomes a lifelong student in pursuit of mastery. While reading through these two books, I noticed a lot of familiarity with the ideas and methods. The ideas about deliberate practice and cultivating a learning mindset are the backbone to any good music education. Most music students understand that in order to reach any real level of proficiency with their instrument, they must develop a habit of focused practice. Doyle’s rules for talent revolve around this idea of deliberate, focused practice and provide a clear path toward mastery.  In The Little Book of Talent, Doyle breaks down the ideas of how to accomplish goals and master a skill into actionable steps and thoughts. In this series, we will go over each step in his process and show how to apply it to learning guitar or any instrument, really.
     Throughout this blog series, I will show how each idea or rule from Coyle’s books works in the context of learning guitar and how it gives a road map to mastery. You will learn how to practice with a clear goal, how to set up a practice session, how to work on both hard and soft skills, how to approach each practice session, how to deal with plateaus, how to know what to practice, and how to think about practicing and achievement in a whole new way, among other ideas. We will use Dan Coyle’s books to provide a framework for developing mastery and leveling up your guitar skills.
Please be sure to check out the original books on Amazon (at the bottom of the page) to get a broader perspective of his tips on the path toward mastery.
Let’s jump right into it with Tips #1 and #2 from The Little Book of Talent.
Tip 1 & 2: Stare at Who You Want to Become & Spend 15 Minutes a Day Engraving the Skill on Your Brain
     Seeing the skill you want to master performed at the expert level can be invigorating and highly motivating. I have often looked at a concert or a video on Youtube and said, “I want to be that person or I want to be able to do that.” Having role models in your chosen field shows you what is possible and gives you the idea that you too can get to that point. There is nothing like seeing a virtuoso performance in a live setting and being up close to a performance at the expert level can send you out with a musical high that lasts even months later. If you do not have access to a live performance of some of the greats, then Youtube is a great resource to find incredible guitarists and performances from all over the world. You should have your role models that make you want to just work that much harder and make you realize how far you still have to go. Remember, do not get discouraged because if you realize you still have far to go then you have some life to live! Spending a small amount of time a day focusing intently on your role models will help you engrave that level of playing into your mind and help motivate you to be like that! Let’s look at how to use these tips when learning guitar.
Motivation Can Come from Outside
     Coyle points to studies that show how self perception can determine the skill level and how successful someone pursuing a skill will be. One study showed that participants who studied music were greatly affected by their starting point. Those who thought of themselves as in it for the long term and had the mindset of growth rather than intrinsic or innate talent, improved faster and further than those who were just “trying it.” Doyle writes, “With the same amount of practice, the long-term-commitment group outperformed the short-term-commitment group by 400 percent.
     The long-term-commitment group, with a mere twenty minutes of weekly practice, progressed faster than the short-termers who practiced for an hour and a half. When long-term commitment combined with high levels of practice, skills skyrocketed.”
     These participants thought of themselves as musicians from the start and had that image of themselves from the get go. Having a clear mental image of who you want to become has drastic affects on how you approach learning and how motivated you will be during the process. With today’s technology, you can go on Youtube and see many people accomplishing fantastic feats and demonstrating mastery and talent. If you are able to imagine yourself as the person and feel yourself performing those same feats, then you will be more intrinsically motivated and more apt to see the process through to the end result.  “A vision of their ideal future selves, a vision that oriented, energized, and accelerated progress, and that originated in the outside world.”
Mental Imaging and Technique – “Feel” the Motions without Moving
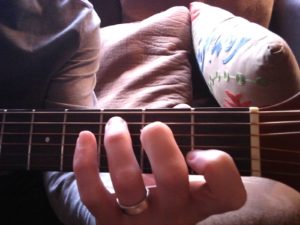
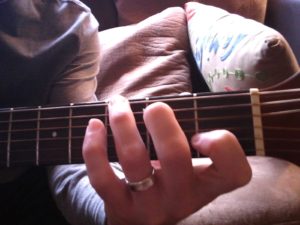
     Throughout my teaching and writings, I often point to the very powerful idea of mental imaging – where you visualize in as much detail as possible, the skill that you are working on. The head of the guitar faculty at my university was the first person to really drive this lesson home for me. He would have me put down my guitar and put away the sheet music and just picture the music in my mind. Then, he would have me imagine how it would feel to play the music – all of the little details like finger movements, hand jumps, the strings being played, the right hand fingerings, any string jumps, hearing the musical phrases etc. – the goal was to be able to perform the music all in my mind with as much detail as possible! This not only improved my memory of the piece but enhanced my physical playing, as well. Tip 2 from Coyle explains that you should watch the skill being performed over and over until you have a high-definition mental blueprint. Watch and listen so closely that you can imagine the feeling of performing the skill. This seems to make sense because if we can truly imagine a skill to the point of “feeling” it without actually moving, then the physical motion will be engraved on your brain.
     In The Little Book of Talent, Coyle writes, “For physical skills, project yourself inside the performer’s body. Become aware of the movement, the rhythm; try to feel the interior shape of the moves.” Upon reading these words, I immediately had a sense of excitement and understanding because I have been doing this even before I learned how to play the guitar! I remember listening to my dad’s classical rock on the radio and hearing the rock guitar gods play the most iconic solos and riffs and just imagining myself physically playing those – every bend, slide, scale run and double-stop. Even though I didn’t know what those things were and I was just 7 years old, I would listen so intently that I could feel those micro moves as though I was performing them myself and I was associating the sounds with the movements. This is a great starting point for any musician. When listening to your favorite music on your instrument, just start by recognizing the little moves (the slides, the chords, melodic movement up or down, bends, double stops, bass versus treble, strumming versus fingerpicking, chords or melodic movement, etc.). Once you can easily hear the movements, imagine what it feels like to actually make those motions. You might not know exactly what strings or chords, but you can, with a little practice, pretty much tell where on the fretboard and even what strings are being played. As you advance with your practice and skills, you can enhance the visualization by imagining the exact fingerings, the sheet music, exactly what it feels like to play a piece or solo and even what it would feel like to play what you hear in your head!
Mental Imaging and Improvising – Learn the Underlying Patterns
     Mental imaging not only pertains to a physical skill, but also works for mental skills. For mental skills, Coyle writes, “…simulate the skill be re-creating the expert’s decision patterns.” Some mental skills of music include improvising, composing, comping, fingering, chord voicing, and interpretation. This is where the real work comes in. Musicians often start learning an instrument by playing songs they know and love. Playing covers and learning how to play like your guitar heroes is a great start for learning basic technique, but most guitarists do it by default and without much thought and don’t absorb the theory behind the music. You can accelerate your learning curve by purposefully seeking out the patterns and recognizing the elements that you like and want to emulate. Learn how to put together your favorite licks, what is the theory behind them, what makes them work, analyze your favorite solos and figure out why you like the way it sounds and how to re-create it and then create something that sounds similar.
     Learn how to improvise by learning how your favorite musicians improvise. You will simultaneously train your visualization skills and understanding while training your ear when you transcribe a solo, learn the licks, analyze the chords and theory, and learn how to play in the style of your favorite players. The idea is to learn everything you can about how the solo works both physically and theoretically so that you can not only play it note for note, but then take those ideas and patterns and use them in other contexts and recognize them in other contexts. For example, if you are learning a solo for a jazz standard over a ii-V-I progression, you can take those ideas and apply them to any ii-V-I tune in any key. Or, if you are learning the opening solo for “Wish You Were Here,” you would be able to recognize that you are playing in the major pentatonic shape and use those licks in other pentatonic settings. When you learn the patterns, chords, scales, fingerings, melodic licks, and harmonic progressions used by your favorite players and composer, then you can take those elements and use them in new contexts and in original ways, thus further enhancing your creative palette.
Conclusion – The Mental Game and Stick-to-it-ness
 
     Motivation can be challenging for many people when learning an instrument – especially at the beginning stages. With a good mindset, a good teacher, (more on those later) and good role models, a beginning musician can stay highly engaged and motivated. The easiest place to start is to pick your role models – those guitar gods that just put you in awe. Use their examples as the ideal stage for which to aspire. Imagine yourself at that level and playing those killer solos or tunes. Imagine performing those exact feats exactly as they do. Your mental game of visualizing will provide the motivation and the clear picture of how you want to be and is the easiest way to get started down the path of mastery. Remember, every master started as a beginner and struggled along the path. The only difference between them and the countless others who tried is they stuck with it and put in their time. Will you put in yours?
Next Time
Stay tuned for the next post in this series where we will explore proven techniques to progress with your practice.
Some of My Guitar Gods for Inspiration
 
For the classical guitar enthusiasts out there (and for those who like to see any killer guitarist) check out some personal favorites and recommendations in no particular order:
  • Roland Dyens – for fantastic, personal interpretations, original compositions and outstanding improvisation
  • David Russell – one of the living legends. His interpretations of classical guitar standards have become the standard.
  • Pablo Villegas – for fresh interpretations and perspectives of mainstays in the classical guitar repertoire
  • Sergio and Odair Assad – living legends and awe-inspiring technique; fantastic original compositions and arrangements from Sergio
  • Dusan Bogdanovic – for insanely original compositions, one of the best improvisers on the instrument and ridiculous technique and finger independence. Also, one of the most intelligent musicians on the planet.
<script type="text/javascript"><!-- [et_pb_line_break_holder] -->amzn_assoc_placement = "adunit0";<!-- [et_pb_line_break_holder] -->amzn_assoc_tracking_id = "fluentguitar-20";<!-- [et_pb_line_break_holder] -->amzn_assoc_ad_mode = "search";<!-- [et_pb_line_break_holder] -->amzn_assoc_ad_type = "smart";<!-- [et_pb_line_break_holder] -->amzn_assoc_marketplace = "amazon";<!-- [et_pb_line_break_holder] -->amzn_assoc_region = "US";<!-- [et_pb_line_break_holder] -->amzn_assoc_title = "Shop Related Products";<!-- [et_pb_line_break_holder] -->amzn_assoc_default_search_phrase = "the talent code";<!-- [et_pb_line_break_holder] -->amzn_assoc_default_category = "All";<!-- [et_pb_line_break_holder] -->amzn_assoc_linkid = "211c1b52439af96dff2dc91f5670d8e2";<!-- [et_pb_line_break_holder] -->amzn_assoc_search_bar = "false";<!-- [et_pb_line_break_holder] --></script><!-- [et_pb_line_break_holder] --><script src="//z-na.amazon-adsystem.com/widgets/onejs?MarketPlace=US"></script>

Guitar & Mandolin Group Lessons

Benefits of Group Music Lessons

Guitar and mandolin group lessons are a great way to learn music. There are many advantages to taking group lessons. It can be a fun introduction to new students and a way to get your feet wet. It can also be a fun and challenging environment for more advanced players to work on skills not normally touched upon in private lessons. Some benefits to group lessons include:

  • the friendly sense of competition and accountability helps motivate students and brings a built-in support group
  • students are able to learn from each other and develop musical relationships that often continue outside of lessons
  • the musical selections can be more varied and students have more performance opportunities
  • you will learn how to play music with others and develop your listening skills in a practical setting
  • improved rhythm and timing
  • gives context to musical exercises and techniques
  • provides a comfortable environment to work on songwriting and composition skills
  • improves your reading ability
  • allows the student room to develop improvisation and accompaniment skills
  • lessons are more affordable and provide more opportunities for faster improvement
Group music lessons give immediate context for students to use techniques and knowledge to play in a musical setting. Students are encouraged to experiment and test their understanding of how to use the subject material in a real musical situation like jamming. Group play and making music with another human being is rewarding in and of itself, but the benefits of having to interact with other musicians will take the student to new musical heights that cannot be as easily attained by playing and practicing alone.
The main focus of group music lessons is to enhance the musical ability of the students. This means, that while individual lessons may still be needed in order to work on specific techniques and student issues, the musical aspects of playing will be the focus of the group time. The magic of playing with others and how that improves a music student’s abilities cannot be overstated. There is also the idea of group comradery and life long friendships forged from playing music together. Playing and learning together gives a great sense of accountability and positive peer pressure to achieve and keep up with the group. When partnered with other players of various abilities, students often learn new elements of music and technique from each other and reinforce their own understanding of the materials.
Group lessons are a great value for the student and an excellent setting for students to achieve their musical goals.
The First 4 Chords & Basic Left Hand Position

The First 4 Chords & Basic Left Hand Position

Many classical guitarists find invaluable guidance from Scott Tennant’s book Pumping Nylon. In the introduction of the book, Scott describes the left hand finger placement and accuracy and he address much of the same principles as I will describe here. However, I have added a little more commentary and some extra tips and exercises to help convey more of the feeling and sensation of how to engage the left hand while playing.

Basic Left Hand Position and Tension

Your left hand is the most important part of the equation when it comes to playing well. It facilitates your speed, your applied theory knowledge, and can be the single most important factor determining your skill level. Focusing on your left hand alone could bring your playing to new heights. No matter how advanced you are, you can always benefit from focused left hand work, especially going back to the basic left hand position and movement. I often return to this concept to reinforce my playing.

The basic left hand position involves all four fingers, all on one string, each on its own fret (IE 1,2,3,4). Be sure to press with the tips of your fingers. Let your fingers curl almost naturally. (to feel this: take your hand an relax your fingers. Notice the natural curl and shape of your hand) Make sure none of your fingers or knuckles touch. Notice the slight angle of each finger when spread over a 4-fret span. Do not fight the angle. The thumb should be on its pad, slightly locked as if pushing a door open and in the middle of the neck, directly behind your 2nd finger. Now press on the string with all four fingers with as little pressure as needed to make the string touch the fretboard and make a clean sound when plucked. Then, release the tension but keep your fingers touching the string and in position above the frets. You don’t need to squeeze. Just use minimal pressure, a light touch and the weight of your hand and fingers. Notice how little movement you need to release the tension. The smaller the motion of release, the faster you will be able to move and play.

The goal is to release all unnecessary tension where possible.

For a bonus – remove the thumb completely while fretting with your fingers. Notice how the weight of your arm and hand come in to play. The thumb is there for support but you should be able to fret cleanly by applying the minimum tension with the feeling of the weight.

Cliff-Hanging Fingers!

Applying minimum pressure with the fingers is the key to moving fluidly. A great demonstration of the minimum amount of pressure you should use involves taking the basic left hand playing position with all 4 fingers on 1 string. Make sure you are on the tips of your fingers. Then, drop your left shoulder and relax your arm so the only thing holding it up is your fingers on the guitar. It should feel like your arm would drop if not holding on by the fingers. Now you are hanging by your fingers like a mountain climber hanging on a cliff! Though this is an exaggerated position, the same mechanics are at play when using minimum force on the strings. Use the weight of your whole arm to help support the hand and fingers when applying pressure.

Get Those Fingers Moving

The next exercise (Chromatic Scale) will help you practice the immediate pressure and release of tension in a playing situation. Start with the four fingers spread over the 4 frets in playing position but not touching the string. Place the first finger down with the minimal tension you learn from the previous explanation and pluck the string with the right hand. (Don’t worry about the right hand right now. Use any stroke you wish – with a pick or alternating fingers i and m using rest stroke or free stroke). Next, release the tension in the first finger and bring it back to playing position just above the string while you shift the weight to the second finger with the same immediacy as the release. Try to feel the weight shifting in the whole hand. Repeat the same process for the next 2 fingers and then move to the next adjacent string to start the entire process again. Repeat on all six strings and then reverse the process. Start with your 4th finger (the pinky) on the 4th fret while the others are in playing position. Then shift the weight to your third finger while simultaneously releasing the tension of your 4th finger. Repeat this process for all 4 fingers on all six strings. Make sure to play slowly and to concentrate on feeling the weight shift in your whole hand and feeling the weight of your arm and hand to help apply the minimum pressure with your fingers.

The 4 Chord Shapes

     We can extend the left hand playing position logically into basic chord shapes. The goal is to keep the basic playing position and 4-finger spread while stretching it out to help develop more dexterity and strength.
     The first chord shape involves the 4-fret spread but stretched over adjacent strings starting with the first finger on the first fret of the first string and extending to the 4th finger on the 4th fret of the 4th string. This gives us a Major 7th chord – specifically a F# Major 7th chord. Nice sounding, isn’t it? This shape can be moved up the neck to create all Major 7th chords and is a great shape for arpeggios – more on that later.
     The second shape only uses 3 fingers. It starts with the first finger on the first fret of the second string and extends to the 3rd finger on the 3rd fret of the 4th string. You can play the open 1st string if you wish for a nice Major 7th sound. This is the ‘F’ shape.
     This next shape also only involves 3 fingers and it uses the same basic shape as the ‘F’ shape but stretches it a little farther. Start with your first finger on the first fret of the second string like the above example. However, skip the 3rd string and place your second finger on the second fret of the 4th string. Then, end with your 3rd finger on the 3rd fret of the 5th string. This give you the ‘C’ shape – named for the actual chord you are making in the first position.
     Shape number four is the G7 shape. It again, stretches out the ‘F’ shape a little further. Place your first finger on the first fret of the first string. Then skip up to the 5th string with your second finger on the second fret. Finally, place your 3rd finger on the 3rd fret of the 6th string. You may strum all 6 strings for this one.
     As a bonus and purely for a left hand exercise (meaning it won’t sound that great), play the last 3 shapes all while keeping your pinky down on the second or third string on the fourth fret. This will really stretch those fingers!
     Play around with the order of the different chords and come up with something that sounds nice. There are a number of popular songs that use these chords (IE The Lumineers “Ho, Hey”) The point is to get your hand used to making those stretches effortlessly. Remember, we started from the basic left hand finger positions all on one string and gradually stretched it out to other strings all while maintaining the minimum necessary tension.


You Are Playing Guitar Wrong! Finding Your Optimal Guitar Position

     We have all seen it before – the guitar slung so low it could kill ants or the laid back singer-songwriter leaning so close to the guitar you think she just might kiss it. You might even be guilty of it yourself. What you might not know is your playing position is probably the most important way to either enhance or kill your technique.
     When I first started playing guitar at age 11, it was in the midst of the grunge era  – you know, baggy pants, flannels, thermal shirts. Playing loud and heavy was the order of the day, and all the cool guys were slinging guitars down to their knees. After trying to play like that for a little while and struggling to get some of the riffs sounding smooth, I realized that there was a difference in my playing when I practiced while sitting versus playing while standing. So, I decided to try to mimic my sitting-style playing and one of the first steps was to bring the guitar up closer to my chest. And voila! Suddenly, those transitions and “difficult” riffs I was hacking through became smooth and almost seamless. You might have had a similar epiphany at some point and just took it and ran with it. What you might not know, is that is just the beginning of your improvement with guitar positioning.
     The absolute first thing to learn and use every time you pick up your instrument and no matter how advanced you are, is to stay relaxed while playing and release any unnecessary tension. There are more specific techniques with which to do this as you progress but it all starts with your playing position and understanding of a few key principles.
The Classical Position
    For a well-thought out guide on classical guitar sitting position, check out ThisisClassicalGuitar.com by Bradford Werner. (Basic Posture and Sitting Position)
    The best playing position for each individual will vary slightly but the core principles remain the same. Keep your shoulders relaxed (not hunched) and pulled back (slightly extended chest); the back should be straight and feet planted – you should be able to let your arms hang and feel the weight of gravity. The optimal guitar position is at a range of 30 degrees to about 45 degrees angled up. Place the guitar on your left leg – the idea is to give your left hand (fretting hand) easy access to the guitar neck without bending at the wrist. Any wrist bending will create tension with your tendons and interfere with the movements of your fingers. (to demonstrate try bending your wrist forward and making a fist. You will feel the tension in your forearm and wrist and it will eventually travel up your arm to your shoulder.) This is why when you are hanging low with your guitar, you find it difficult to move your fingers smoothly.
     Breathing regularly and through your diaphragm will help keep you in a relaxed state (plus it is important to life!) and I suggest starting an almost meditative practice of bringing attention back to your breathing while playing – when you notice yourself holding your breath, then release it and focus on breathing regularly again – do this every time you notice holding your breath. Holding in your breath creates a lot of tension in your shoulders, which travels down your arm and to your fingers. The mindful attention to your breathing should then journey to any tension you feel in your shoulders and back – breathe consciously and release any tension.
The Casual Position
     I recommend only going to the casual position after you have experimented with and understood the principles behind the classical sitting position. You can transfer some of those ideas to the casual position but you will be limited by a few factors. Gravity and weight of your fingers and hands should still be a central focus, though you might have to play around with your position to approximate a similar feeling. Notice the left arm and hand will not be able to access the entire fretboard as easily. You will have to bend your wrist a bit more and apply more squeezing pressure rather than relying on the weight of your arm. You will also have to struggle more to reach the higher frets. Your right hand will most likely rest a little higher on the body and moving the right arm to reach different timbres and sound colors will be more difficult. That being said, the casual position can be used to great affect once thought through. Finding the balance between the classical position’s effectiveness and the casual position’s ease and comfort is a personal journey for every guitarist. Trust your body’s instincts and keep the idea of minimal tension with quick release in mind at all times – and remember to breathe!

Why Every Guitarist Should Learn Classical Guitar

         Classical guitarists are some of the most, if not, the most technically and musically accomplished guitarists out there. Though, they are almost always relegated to a dark, mysterious corner of the guitar world. Guitarists in the know might revere these technical wizards and stand in awe at the almost incomprehensible ability to play full solo works with their fingers. The general public, however, has mostly never heard of classical guitar or think of guitarists playing Mozart or Bach. Most guitarists see the word “classical” and immediately think “boring!” They might think that they could never learn to play like a classical guitarist and that it requires years of practice and study. My goal is to take the art of playing classical guitar out of the realm of the esoteric and put the useful knowledge into the hands of every guitarist. Once a player has the technical tools and knowledge available to a classical guitarist, then a whole world of possibility opens and almost any guitar challenge can be conquered. If you have a strong foundation of techniques and knowledge from the classical guitar, then you will be able to play and understand almost any music.
The idea of classical guitar is not to play classical music but to approach the playing of any piece with a full range of knowledge and techniques of the fretboard and fingers.
    The term “classical guitar” encompasses much more than a guitarists who plays classical music. It is more accurate to describe it as a certain approach to playing and learning music for the guitar. The classical guitar repertoire has grown to include all sorts of styles from straight classical to jazz, Brazilian, Flamenco, African, and modern pop music. The idea of classical guitar is not to play classical music but to approach the playing of any piece with a full range of knowledge and techniques of the fretboard and fingers. Songs of the Beatles or even Adele are not off limits and the classical guitarist will often arrange and play these tunes for various occasions. What the classical guitarists does with these tunes is where they differentiate themselves and shine. Chords, harmonies, and self-accompaniment fill out the sound for a soloist, and the techniques to play multiple parts at the same time give the classical guitarist the self-sufficiency that almost no other style enjoys.
     This blog will go over various techniques and knowledge parsed from the classical guitar literature to give you the strong foundation from which to tackle any guitar challenge from any style of playing. You will not become a classical guitarist from these lessons, but you will learn the essentials from the classical guitar and be able to apply them to any style and genre of your choosing (including classical, if you wish).
Skills you will learn from the classical guitar method:
  • how to practice
  • sight reading
  • fretboard knowledge
  • music reading
  • unique chord voicings
  • how to accompany yourself
  • playing multiple parts at the same time
  • good tone production
  • fingerstyle right hand technique
  • ergonomic playing
  • how to play musically
  • theory applied to the fretboard
  • music history and style
  • expanded repertoire
  • how to bring out a multitude of different sounds and timbres from the instrument