(805)242-1586 justin@fluentguitar.com
Guitar Mastery: Hard and Soft Skills

Guitar Mastery: Hard and Soft Skills

Most tasks can be categorized into either a hard skill or soft skill. An example of a hard skill includes being able to precisely play a G chord to C chord perfectly every time or being able to play the G major scale perfectly at a specific speed. A soft skill might include being able to use the G major scale while soloing or interpreting a passage of music and imbuing it with a certain emotion. The trick, Dan Coyle give as Tip #7 is to figure out if you are practicing a hard skill or soft skill.

Hard skills are about repeatable precision. On guitar, this can include: playing the correct notes for a piece of written music, playing a chord change consistently, knowing and playing your scales at a specific speed, being able to perform the tremolo technique, executing the rhythm of a written piece, playing arpeggios, rasguedo technique, recognizing the changes, and so on. Basically, anything that can be considered a technique or technical challenge – the physicality of playing the instrument and applying specific knowledge to execute consistently every time.

If hard skills are the physical aspects of playing, soft skills would be knowing how and when to apply the appropriate hard skills. Soft skills are about instantly recognizing patterns as they unfold and making smart, timely choices. In order to execute on your recognition, you must have the solid foundation of technique (aka hard skills). Some soft skills on guitar might include: sight reading, improvising, comping, interpreting written music, playing to an audience and so on. Soft skills are about being agile and interactive – you are constantly reading, recognizing, and reacting.

Tip #7 tells us to determine if we are practicing a hard or soft skill because there is a different approach to practicing each type. You must first be able to categorize the skills and notice the subtle difference between the two types in order to pick the appropriate mindset for practice and development.

The following three tips take this idea further, explaining the method of deep practice that work best to develop each type of skill.

Tip #8: To Build Hard Skills, Work Like a Careful Carpenter

Be careful, slow, and keenly attuned to errors. Make one simple move at a time, repeating and perfecting it before moving on. Pay attention to errors and fix them. This is where having a good teacher comes in. Often times as a novice, it is difficult to determine the errors and, furthermore, it is not always obvious how to fix them.

Coyle gives the example of the Suzuki Method for learning an instrument. He writes, “…they (students) learn to hold the bow without the violin, and go through the bowing motion. Each fundamental is worked on over and over until mastered. Precision is especially important early on because the brain is good at building connections but not so good at unbuilding them.” Read that last part again. If you had piano lessons as a child, maybe you went through the motions of learning scales and simple pieces before you could tackle pieces you actually wanted to play. You might have even quit before you got to the point of playing music you actually wanted to play. Many music teachers focus on the fundamentals and force kids to drill over and over because they know that learning a foundational skill the right way is easier than having to go back later to fix it. Though it might be boring to the student, these fundamentals are paramount to playing real music at a more advanced level.

Remember Daniel-son from the Karate Kid? Mr. Miyagi had him wax on and wax off and paint on and paint off every day for a considerable time. Now, remember why Daniel had to repeat these seemingly inconsequential motions? Mr. Miyagi was drilling the fundamental movements into Daniel’s motions and, therefore, teaching Daniel the basic movements to start practicing karate. If Daniel had neglected to follow Mr. Miyagi’s instructions, then when Mr. Miyagi went to test him by throwing a punch and kick, Daniel would have been knocked to the floor unable to block properly.

So next time you feel bored by drills or going over some basic techniques, remember that you might get punched in the face (proverbial speaking) when challenged with playing a piece of music if you did not prepare properly.

Important side note: a good teacher will make learning these fundamentals as fun and relevant as possible by guiding students through appropriate level pieces and techniques. Practicing the fundamentals does not have to be boring!

Tip #9: To Build Soft Skills, Play Like a Skateboarder

I used to skateboard from the time I was a kid until moving to college. It was a fun, addicting sport and I couldn’t wait to get home everyday to go out and skate. Each day, my friends and I would go out to find new spots or try new tricks on familiar spots – there was always a challenge or some new trick we were trying. Though there are definitely the hard skills of knowing how to ollie, kick flip etc., the challenge was always how to use those skills in new environments (over stairs, on new ledges, etc.) We would have to familiarize ourselves with new spots or new transitions and apply what we knew to new environments. As we rolled along on our skateboards, we would have to survey our passing environment and recognize obstacles and size them up in order to apply our tricks to the ever-changing landscape – constantly adjusting and reacting to the new terrain.

Soft skills are built by playing and exploring inside challenging, ever-changing environments. They are the result of super-fast brain software recognizing patterns and responding in just the right way. Some examples of soft skills on the guitar include: jamming with other musicians, live performances, improvising, and comping. These are places where you encounter different obstacles and respond to them over and over. To develop soft skills, you should explore, seek challenges and play. The goal with soft skills is to repeat them as often as possible in new ways and to get clear feedback. Do not focus on mistakes or errors – it is more important to explore and play. After each session ask yourself, “What worked? What didn’t? Why?”

For a more adult-oriented post about creating an environment to play with the soft skills, check out my post here. (Adult content warning)

Tip #10: Honor the Hard Skills

“Most talents are a combination of soft and hard skills. Prioritize the hard skills because in the long run they are more important to your talent.”

It is well known that many experts at the top of their fields stay sharp by drilling the fundamentals regularly. Case in point, Yo Yo Ma starts each session by playing single notes, working on tone and playing scales. You must keep the hard skills sharp in order to remain agile and apply them as needed. Being able to move your fingers fluidly and accurately allows you to play anything else you work on and apply the soft skills of musical interpretation, improvisation and creating music.

Most of us want to jump straight in to playing certain songs or learning that solo or playing like “that guy” (insert any guitar hero here). We often do not realize how many hours of dedicated work on fundamentals and basic technique goes into a performance. Hard skills will give you the technical prowess on the guitar but the soft skills are where most of the fun happens. The trick is to recognize there are 2 different modes of practicing and you must be clear as to which mode to apply when practicing. Prioritize the hard skills because it will enable you to perform the soft skills with clarity and ease. Use the hard skills to facilitate the soft skills. Relish the chances to explore and create. Jam with as many friends as possible, listen to many different musics, try to figure out that hot lick from your favorite solo and how to throw that in to your arsenal, figure out how to sound ‘oustide’ on your next solo break, throw out some funky chords, move those fingers around to find new chords and extensions, and remember to have fun while discovering new sounds.

Guitar Mastery: Deliberate Practice

This is the 4th post in the series Guitar Mastery, where we explore the tips from The Little Book of Talent by Dan Coyle. To start at the beginning, visit posts 1, 2 and 3.
Up to this point, we have been looking at the tips that show what the path to mastery looks like and getting in the right mindset. Now, we will explore some specific practice tips and explain what practice looks like for the most efficient improvement. First, let’s define what practice really is.
What is Deliberate Practice
 
We have all heard about the ten thousand hour rule, which states that to master any skill, one must dedicate 10,000 hours of practice to the craft. This idea was popularized by Malcolm Gladwell in his book, Outliers. What most people fail to read, and what Gladwell himself failed to understand in his book, is that 10K hours was an average picked at a random time (20 years of age) in the life of those pursuing mastery. There was no rhyme or reason for choosing the arbitrary time and hours except that they are nice round numbers. Furthermore, the subjects of the study were not yet masters of their craft and it showed that the hours put in are variable depending on the field. Also, the 10K hours calculated did not distinguish between deliberate practice and any other activity that might be considered practice. Most people read this rule as if you simply need to put in the time to become a master – that it is as simple as putting in 10K hours to achieve mastery. If you read the original studies cited by Gladwell, you will find that deliberate practice of a skill will lead to mastery and can often shortcut the amount of time you need to practice to reach a high level of performance – often, the number of hours of deliberate practice by masters of their craft was far less than 10K hours. In fact, Anders Ericsson and his colleagues concluded that it does take about 10 years of deliberate practice to truly become an expert, and that most experts put in an average of about a maximum of 2 hours per day, which after 10 years adds up to about 7K hours of deliberate practice.
Deliberate practice can be summed up with these three key elements: working on technique to improve performance, seeking constant critical feedback, focusing ruthlessly on fixing any weaknesses and doing all of these with a specific goal. Read that again. Now ask yourself if you practice this way. Answer honestly. Most of us do not naturally start this way. We want to avoid the parts that are too hard and we tend to gloss over any minor mistakes to keep going with the bigger picture. Masters, on the other hand, remain in those spaces as much as possible because they know this is how you advance your skill. When we find ourselves stuck or seemingly not improving, it is usually because we are not paying close enough attention to our mistakes and glossing over any sticking spots. Action: play through any piece you are working on right now and pay careful attention to the details. Better yet, record your performance and listen back for any mistakes (miss-timed phrasing, a missed note or notes, unclear lines & voicings, etc.) Do this to become aware of the little issues you might be glossing over to finish the piece.
Most of the specific tips from The Talent Code address an idea of deliberate practice. It is through the lens of deliberate practice that Coyle has framed his list. As we explore the next tips in the series, keep in mind the basic tenants of deliberate practice: practice with a specific goal, seek constant feedback and immediately fix any mistakes. By hunting down your mistakes and forming good habits, your path to mastery may feel like hard work (and it is!) but you will never be lost!
How to Practice
Tip #18: 5 Minutes is All You Need
Practice is a habit and more than that it is a way of being. A master is one who enjoys the struggle and lives the practice. The master is almost obsessed with practicing and everything they do is a sort of practice. One way to cultivate this mindset and deep dive into a craft is to develop a simple habit. Notice I said simple and not easy. A simple habit might be something like, I will stop playing when I make a mistake on a piece and then slow that part way down and play it for 5 minutes. Or I will focus on one trouble spot for 5 minutes a day – no more and no less. This simple limitation not only helps you focus because you have such a short amount of time, it will also be an easier way to kick start a daily habit that will later grow into more time as you practice the habit and exercise your focus. Focus is like a muscle, and just like a muscle, it needs to be engaged regularly to help it grow. Most of us are so used to bouncing back from one task to another whether it is checking the Facebook or social media, then reading an article that catches your attention, then writing the next email or clearing the inbox. Deep, focused work where you get into a flow-like state is the best way to actually practice and get any work done to a high standard. Start small with 5 minutes a day. You can go over if you really want, but set a timer and note when the 5 minutes is up and be ok with stopping right then.
Once you have this daily habit going for a month, it will feel like something is missing if you do skip a day. Kind of like working out – after regularly working out, a missed day feels like you need an extra cup of coffee or you woke up on the wrong side of the bed. While creating a daily habit is a great start, you might be wondering what to do in those 5 minutes. This is where the real work begins. Those 5 minutes will feel like real work – like you are struggling and not seeing any improvement. Masters revel in these moment because they know this is where the real learning resides. Mastery is being comfortable with struggling just out of your limits and pushing yourself to stretch past your current level. It is not afraid of monotony or the plateau because that is where the magic happens. You must be willing to stay on the plateau because that is where the work is. Imagine playing through a song and you notice that a transition from one chord to the next feels a little uneasy or is not as smooth as the others. Your could just flub your way through it and drop a few strokes to stay in rhythm, but glossing over will not help you improve. You must stop and focus on the struggle. Slow it way down, play with it, make it a game, analyze the movements from every angle and sit with it regularly. The first trick is to recognize the mistakes immediately and be able to stop in order to start the real work.
Deliberate practice is narrowly focused on one aspect and requires the utmost attention to detail. Your current skill level dictates the level of detail you can focus on and different aspects will be apparent to you as you progress.
Tips #5 and # 17: Be Good with Being Bad and Embracing the Struggle
Notice that we have been describing how practice is a struggle. You will feel awkward and stretched to your limits. In order to break through to the next level, you must be comfortable with being bad. No matter where you are with your skill, there is always something that you do not know or cannot play quite yet. Reaching these limits are where you find your current sweet spot for practice. You should embrace your struggle and the feeling of not being able to execute exactly how you would like and be good with being bad. Do not let that feeling deter you but, instead, let it fuel your practice and motivate you because you have found your next challenge that will get you to the next level.
TIP #26: Slow It Down (Even Slower Than You Think)
Another aspect that most beginners struggle with when practicing is wanting to play everything at speed. This goes back to the idea of glossing over mistakes to just get through a piece. One part of being OK with being bad, is to be willing to play things ridiculously slow…and I mean, really slow. When you practice slowly, you play with intention and you are forced to think about all the little micro-movements and understand the rhythms and inner working of the phrases. If you can’t play it slow, then you can’t play it fast. Be willing to look stupid and play excruciatingly slow. Going over the music in slow motion also helps solidify the motions and the music in your mind. It will be tough going at first, but once you get used to practicing like this, you will notice immediate improvements with your playing.
Test this out. Take a piece you are working on now and find a trouble spot or even take a piece you know well that you want to improve somehow. Then, play through the trouble at an extremely slow speed and work through that way for about 10 minutes. Then, take a 10-15 minutes break. Finally, come back to the piece and play through those spots at a normal tempo. You will almost always find that you think through those spots with greater clarity and even “see” those passages in slow motion while playing at normal speed. It is because you were forced to break down each tiny movement to build the phrase and pay attention to the physical details while training your hands to move precisely and concisely.
I hope you are enjoying this series on mastery. If you are getting some actionable advice from this, then please spread the knowledge and share the post with someone who might also benefit. Let me know your thoughts by leaving a comment below. How long can you currently stay focused in deliberate practice?

Guitar Mastery: Tip #4 – Buy a Notebook

The next tip in the series based on Dan Coyle’s book, The Little Book of Talent, starts to get into the ideas of how to practice, and sets you up to start your regular practice schedule. If you missed the first 2 articles to start the series, please go and read those first.
 
There is a common saying that states, “What gets measured, gets managed,” which means that unless you can measure and track progress, you will not make any real motion forward and risk meandering or hitting a plateau because you are not sure what to work on or how to improve. If you do not know where you have been and where you are now, then you cannot steer the proverbial ship toward any meaningful destination. While there will be much focus on how to actually practice further along in the series, the first step is to prepare to measure and take notes. Of course, you can choose to take notes in what ever format is convenient and easiest for you, but I strongly recommend a physical notebook (as opposed to an online note) that is kept with all of your practice materials and instrument. Part of the reason for the physical recommendation is that you may wish to convey an idea with written music or drawings or sketches. 
 
This all begs the question, “Exactly, what notes am I supposed to take?”. The beauty of having a notebook to track your practice sessions, is that it becomes your personal road map to mastery. Each session builds upon the last and as your skill level increases, so does the level of detail in each practice. Generally, you want to take notes on at least these 3 criteria:
 
  1. what you practiced
  2. any trouble spots you encountered
  3. what you will practice next time
Of course, the more detailed you get with your notes, the more set up you will be for your next practice session, and that is the main point with having a notebook. However, If you start with these 3 basic ideas, then you will have enough to at least keep track of your progress. As Coyle puts it, “Results from today. Ideas for tomorrow. Goals for next week.” Follow this simple method and you will always know where you are and what to work on, therefore, you will always be making progress.
 
Next, we’ll explore some more in depth approaches with the notebook using some of Coyle’s tips further along in the book.
 
Tip # 22: Pay Attention Immediately After You Make A Mistake
 
Coyle writes that we have a very small window to catch our mistakes (0.25 seconds to be exact!) and he stresses throughout much of his research that one of the key differences between masters of their craft and amateurs is the ability to hone in on mistakes and ruthlessly correct them. He also writes that people have a choice, either ignore the mistake all together or pay attention. It is extremely easy to just let most mistakes slip by with a thought like, “Well, that wasn’t perfect but it sounded good enough.” The “good enough” part is exactly what you should avoid!
 
Train yourself to pay attention to your mistakes and then bring them squarely and clearly into focus in order to work on them. This is where the notebook comes in. For a deep, focused practice session, you will write down or indicate where you made the mistake, what the mistake was and dissect the reason(s) for it (were you playing too fast, the rhythm wasn’t quite right, you hit the wrong note on the 3rd beat, your hand had trouble stretching, etc.) the more detailed and examined your reasons for the mistake, the more you will be able to correct it. Practice intently while listening for mistakes and then document it in the notebook. Take corrective action to fix the mistake and write that down in the notebook. If you reach another part with a mistake, stop and make note of that for the next practice session. We will explore more in depth with more tips related to how to practice and how to fix mistakes in a future article, but start the habit of noting your mistakes now. 
 
Tip #39: Practice Immediately After a Performance
 
This next tip goes hand in hand with noticing your mistakes. Right after a performance, you know what felt right and what went wrong. Coyle suggests getting that notebook out and jotting down those rough spots from the performance while they are fresh in your mind. That way you can go back to correct the mistake during your next practice session. I would caution to note these down and then forget about them to enjoy the afterglow of your performance. Your friends, family and audience members will respond to your overall mood after a performance and they will be excited for you – so go enjoy good company after a nice performance and leave the work for later – just make sure you wrote down your thoughts and observations!
 
Tip #29: When You Get It Right, Mark the Spot
 
On the flip side of your mistakes are the times when you just nail the execution. It just feels right and sounds great. When that happens, take out your notebook and jot down a few points: what did it feel like, what were you thinking about while performing it, what did it physically feel like to play it. etc? This is most important after you have identified a mistake and worked on it until you hit a perfect execution of that musical passage. You should freeze and make notes of all the sensations as mentioned above and take as clear a mental picture of the action as possible and incorporate the ideas above. This then becomes your new starting point for practicing. Repeat that for the rest of the practice session until it becomes automatic. Again, we will go more in depth with how to develop a practice routine with future tips in the series. 
 
By now you have a good idea about what it might take to really put the effort in to learning an instrument. In the upcoming article, we will go in depth and explore how to practice, define deliberate practice, learn how to structure a practice session, and learn some techniques for correcting mistakes and attain your goals on the guitar. I love hearing your feedback and ideas about the topic. Please leave a comment below and share with any one you know who is learning an instrument.

Guitar Mastery: Tip #3: Steal Without Apology

We continue with the series focused on the tips laid out on the path to mastery by Dan Coyle in his book, “The Little Book of Talent.” If you are interested in learning more about the research and how these ideas were formulated, then please check out Coyle’s books on Amazon. You can check out my post about Tips #1 & 2 here
 
Tip #3 is brief and to the point but has been used for thousands of years by people looking to master their craft. Countless quotes have been documented about the idea of “stealing” ideas to use as your own when creating art. You have no doubt heard at least one. For example, Igor Stravinsky is quoted as saying, “Good artists copy; great artists steal.” In this article, we will explore this simple but powerful idea that will help take you further down the path toward mastery. 
 
First, let’s clarify what “stealing” actually means. Does it mean that we take an idea verbatim and call it our own? Does it mean we take an idea and mold it, shape it, and play around with it to come up with our own unique spin? Both are true and both should be used by an artist. I know that in this day in age, we have court cases that warn against “stealing” other’s musical ideas and using them as your own (see the case of Robin Thicke and Marvin Gaye), and I have my own opinions on the matter, but despite the potential risk and punishment, “stealing” musical ideas has been used for centuries and was a common practice up until recent history. The recording music industry itself was even born on the backs of musicians stealing from other, often unnamed, musicians of their day. Whole genres have been born by stealing from other music. (Rock ‘n Roll or Hip-hop anybody?!). The point is not to argue one way or the other about the morals of stealing but just to show that it has been and still is a common occurrence and regular practice used by all artists and musicians.
 
There are only so many chords and chord progressions that have been repeated since the beginning of western tonal music and we have heard them all. What makes a piece of music unique is not based on one single element but a combination of different elements such as, rhythm, melody, harmony, harmonic rhythm, melodic development, harmonic development, etc. More to the point, “stealing” in the sense that Coyle suggests, is more about taking a specific idea, approach, technique, or form and figuring out how to use it and how and why it works. He writes how younger members of a musical family often achieve greater artistic achievements, which may be partially due to the fact that they are able to “steal” what works from their older siblings and learn from other’s mistakes. 
 
Here are some ideas of what to steal when learning guitar (keep in mind that every tip from Coyle’s book goes hand in hand and are often heavily interdependent and related. This tip relates very much to tip #1 and 2 in that you can steal from the artists you stare at and from the performances your engrave on your brain – after all, those performances and artists are some of the best): 
 
  • steal specific approach to fingering – as a side note, some classical guitarists and teachers are sticklers for fingering choices and only abide by their own methods (the infamous story involving Andres Segovia and Michael Chapdelaine comes to mind) 
  • steal a specific lick when soloing
  • steal specific chord(s) when writing
  • steal a specific chord progression when writing
  • steal a specific voicing when comping
  • steal a specific melody or motif when soloing or writing
  • steal a specific technique – where would we all be without Van Halen’s popularization of the two-hand tapping technique
  • steal specific lyrics
  • steal specific themes
  • steal a specific interpretation
  • steal specific phrasing of a piece you are learning
  • steal ideas and techniques from other art forms
  • steal raison d’être and philosophies behind the creation of great works
  • steal any idea that inspires you
  • steal a rhythm
  • steal ideas from music around the world – a raga, a rhythm, instrumentation, etc.
 
Using ideas from other art inspires me and adds to my musical arsenal.  In fact i am working on a book that details how to steal from world music to get ideas to enhance your playing and expand your set of tools.  One good example of this is John McLaughlin and his work with Shakti. 
 
I have often found myself listening to a certain style of music or specific artist repeatedly and when sitting down to write or improvise, those elements pop up. It might be a certain chord or certain melody line, or certain lick that catches my ear either consciously or subconsciously. Once i get that down in my fingers, it takes on a life of its own and inspires new connections or new ways of hearing it out of context. 
 
Think about the different elements you can steal and that will inspire you to take a deeper dive and explore that idea. Stolen ideas are a great way to find inspiration and use as a jumping off point to being creative in your own right. Play around with the ideas and combine them in different ways to create new combinations and lead to new ideas. 
 
What inspires you? What have you “stolen” from that lead you to create something new? I would love to see your comments below. 
The First 4 Chords & Basic Left Hand Position

The First 4 Chords & Basic Left Hand Position

Many classical guitarists find invaluable guidance from Scott Tennant’s book Pumping Nylon. In the introduction of the book, Scott describes the left hand finger placement and accuracy and he address much of the same principles as I will describe here. However, I have added a little more commentary and some extra tips and exercises to help convey more of the feeling and sensation of how to engage the left hand while playing.

Basic Left Hand Position and Tension

Your left hand is the most important part of the equation when it comes to playing well. It facilitates your speed, your applied theory knowledge, and can be the single most important factor determining your skill level. Focusing on your left hand alone could bring your playing to new heights. No matter how advanced you are, you can always benefit from focused left hand work, especially going back to the basic left hand position and movement. I often return to this concept to reinforce my playing.

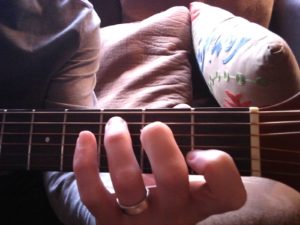
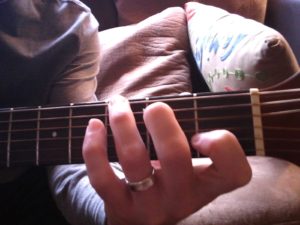
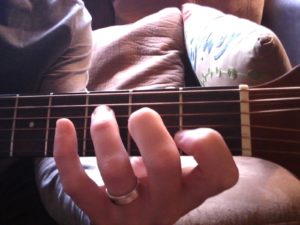
The basic left hand position involves all four fingers, all on one string, each on its own fret (IE 1,2,3,4). Be sure to press with the tips of your fingers. Let your fingers curl almost naturally. (to feel this: take your hand an relax your fingers. Notice the natural curl and shape of your hand) Make sure none of your fingers or knuckles touch. Notice the slight angle of each finger when spread over a 4-fret span. Do not fight the angle. The thumb should be on its pad, slightly locked as if pushing a door open and in the middle of the neck, directly behind your 2nd finger. Now press on the string with all four fingers with as little pressure as needed to make the string touch the fretboard and make a clean sound when plucked. Then, release the tension but keep your fingers touching the string and in position above the frets. You don’t need to squeeze. Just use minimal pressure, a light touch and the weight of your hand and fingers. Notice how little movement you need to release the tension. The smaller the motion of release, the faster you will be able to move and play.

The goal is to release all unnecessary tension where possible.

For a bonus – remove the thumb completely while fretting with your fingers. Notice how the weight of your arm and hand come in to play. The thumb is there for support but you should be able to fret cleanly by applying the minimum tension with the feeling of the weight.

Cliff-Hanging Fingers!

Applying minimum pressure with the fingers is the key to moving fluidly. A great demonstration of the minimum amount of pressure you should use involves taking the basic left hand playing position with all 4 fingers on 1 string. Make sure you are on the tips of your fingers. Then, drop your left shoulder and relax your arm so the only thing holding it up is your fingers on the guitar. It should feel like your arm would drop if not holding on by the fingers. Now you are hanging by your fingers like a mountain climber hanging on a cliff! Though this is an exaggerated position, the same mechanics are at play when using minimum force on the strings. Use the weight of your whole arm to help support the hand and fingers when applying pressure.

Get Those Fingers Moving

The next exercise (Chromatic Scale) will help you practice the immediate pressure and release of tension in a playing situation. Start with the four fingers spread over the 4 frets in playing position but not touching the string. Place the first finger down with the minimal tension you learn from the previous explanation and pluck the string with the right hand. (Don’t worry about the right hand right now. Use any stroke you wish – with a pick or alternating fingers i and m using rest stroke or free stroke). Next, release the tension in the first finger and bring it back to playing position just above the string while you shift the weight to the second finger with the same immediacy as the release. Try to feel the weight shifting in the whole hand. Repeat the same process for the next 2 fingers and then move to the next adjacent string to start the entire process again. Repeat on all six strings and then reverse the process. Start with your 4th finger (the pinky) on the 4th fret while the others are in playing position. Then shift the weight to your third finger while simultaneously releasing the tension of your 4th finger. Repeat this process for all 4 fingers on all six strings. Make sure to play slowly and to concentrate on feeling the weight shift in your whole hand and feeling the weight of your arm and hand to help apply the minimum pressure with your fingers.

The 4 Chord Shapes

     We can extend the left hand playing position logically into basic chord shapes. The goal is to keep the basic playing position and 4-finger spread while stretching it out to help develop more dexterity and strength.
     The first chord shape involves the 4-fret spread but stretched over adjacent strings starting with the first finger on the first fret of the first string and extending to the 4th finger on the 4th fret of the 4th string. This gives us a Major 7th chord – specifically a F# Major 7th chord. Nice sounding, isn’t it? This shape can be moved up the neck to create all Major 7th chords and is a great shape for arpeggios – more on that later.
     The second shape only uses 3 fingers. It starts with the first finger on the first fret of the second string and extends to the 3rd finger on the 3rd fret of the 4th string. You can play the open 1st string if you wish for a nice Major 7th sound. This is the ‘F’ shape.
     This next shape also only involves 3 fingers and it uses the same basic shape as the ‘F’ shape but stretches it a little farther. Start with your first finger on the first fret of the second string like the above example. However, skip the 3rd string and place your second finger on the second fret of the 4th string. Then, end with your 3rd finger on the 3rd fret of the 5th string. This give you the ‘C’ shape – named for the actual chord you are making in the first position.
     Shape number four is the G7 shape. It again, stretches out the ‘F’ shape a little further. Place your first finger on the first fret of the first string. Then skip up to the 5th string with your second finger on the second fret. Finally, place your 3rd finger on the 3rd fret of the 6th string. You may strum all 6 strings for this one.
     As a bonus and purely for a left hand exercise (meaning it won’t sound that great), play the last 3 shapes all while keeping your pinky down on the second or third string on the fourth fret. This will really stretch those fingers!
     Play around with the order of the different chords and come up with something that sounds nice. There are a number of popular songs that use these chords (IE The Lumineers “Ho, Hey”) The point is to get your hand used to making those stretches effortlessly. Remember, we started from the basic left hand finger positions all on one string and gradually stretched it out to other strings all while maintaining the minimum necessary tension.