The First 4 Chords & Basic Left Hand Position
Many classical guitarists find invaluable guidance from Scott Tennant’s book Pumping Nylon. In the introduction of the book, Scott describes the left hand finger placement and accuracy and he address much of the same principles as I will describe here. However, I have added a little more commentary and some extra tips and exercises to help convey more of the feeling and sensation of how to engage the left hand while playing.
Basic Left Hand Position and Tension
Your left hand is the most important part of the equation when it comes to playing well. It facilitates your speed, your applied theory knowledge, and can be the single most important factor determining your skill level. Focusing on your left hand alone could bring your playing to new heights. No matter how advanced you are, you can always benefit from focused left hand work, especially going back to the basic left hand position and movement. I often return to this concept to reinforce my playing.
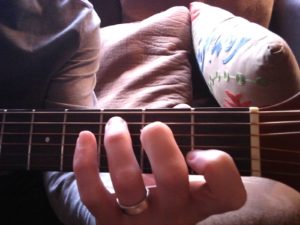
The basic left hand position involves all four fingers, all on one string, each on its own fret (IE 1,2,3,4). Be sure to press with the tips of your fingers. Let your fingers curl almost naturally. (to feel this: take your hand an relax your fingers. Notice the natural curl and shape of your hand) Make sure none of your fingers or knuckles touch. Notice the slight angle of each finger when spread over a 4-fret span. Do not fight the angle. The thumb should be on its pad, slightly locked as if pushing a door open and in the middle of the neck, directly behind your 2nd finger. Now press on the string with all four fingers with as little pressure as needed to make the string touch the fretboard and make a clean sound when plucked. Then, release the tension but keep your fingers touching the string and in position above the frets. You don’t need to squeeze. Just use minimal pressure, a light touch and the weight of your hand and fingers. Notice how little movement you need to release the tension. The smaller the motion of release, the faster you will be able to move and play.
The goal is to release all unnecessary tension where possible.
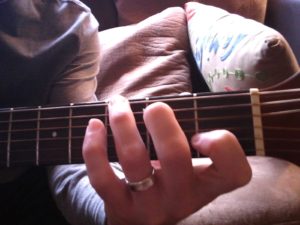
For a bonus – remove the thumb completely while fretting with your fingers. Notice how the weight of your arm and hand come in to play. The thumb is there for support but you should be able to fret cleanly by applying the minimum tension with the feeling of the weight.
Cliff-Hanging Fingers!
Applying minimum pressure with the fingers is the key to moving fluidly. A great demonstration of the minimum amount of pressure you should use involves taking the basic left hand playing position with all 4 fingers on 1 string. Make sure you are on the tips of your fingers. Then, drop your left shoulder and relax your arm so the only thing holding it up is your fingers on the guitar. It should feel like your arm would drop if not holding on by the fingers. Now you are hanging by your fingers like a mountain climber hanging on a cliff! Though this is an exaggerated position, the same mechanics are at play when using minimum force on the strings. Use the weight of your whole arm to help support the hand and fingers when applying pressure.
Get Those Fingers Moving
The next exercise (Chromatic Scale) will help you practice the immediate pressure and release of tension in a playing situation. Start with the four fingers spread over the 4 frets in playing position but not touching the string. Place the first finger down with the minimal tension you learn from the previous explanation and pluck the string with the right hand. (Don’t worry about the right hand right now. Use any stroke you wish – with a pick or alternating fingers i and m using rest stroke or free stroke). Next, release the tension in the first finger and bring it back to playing position just above the string while you shift the weight to the second finger with the same immediacy as the release. Try to feel the weight shifting in the whole hand. Repeat the same process for the next 2 fingers and then move to the next adjacent string to start the entire process again. Repeat on all six strings and then reverse the process. Start with your 4th finger (the pinky) on the 4th fret while the others are in playing position. Then shift the weight to your third finger while simultaneously releasing the tension of your 4th finger. Repeat this process for all 4 fingers on all six strings. Make sure to play slowly and to concentrate on feeling the weight shift in your whole hand and feeling the weight of your arm and hand to help apply the minimum pressure with your fingers.
The 4 Chord Shapes